🌐 中文 English
This article aims to introduce the installation of PyTorch and its commonly used tools. (Please enable VPN throughout to resolve network issues)
What is PyTorch
PyTorch is an open-source deep learning framework developed by Facebook’s AI Research Lab (FAIR). It is known for its dynamic computational graph, intuitive API, and powerful GPU acceleration capabilities. PyTorch is primarily used in fields such as computer vision and natural language processing, supporting researchers and developers in quickly building and training neural network models.
Why Choose PyTorch
- Dynamic Computational Graph: PyTorch uses a dynamic computational graph mechanism, allowing changes to the network structure at runtime, which facilitates debugging and development.
- Ease of Use: PyTorch’s API design is intuitive and aligns with Python coding style, lowering the learning curve.
- Strong Community Support: It has an active community and a large number of third-party libraries, making the development process more convenient.
- High Extensibility: Supports custom layers and operations, making development easier.
Installing PyTorch (Using Windows as an Example)
- Install CUDA (GPU version of PyTorch requires CUDA)
Open the terminal and enter:
1
nvidia-smi
Check the driver version. The official CUDA documentation lists the minimum driver requirements for each toolkit version. For example,
CUDA 12.7typically requires driver version525.85.12or higher.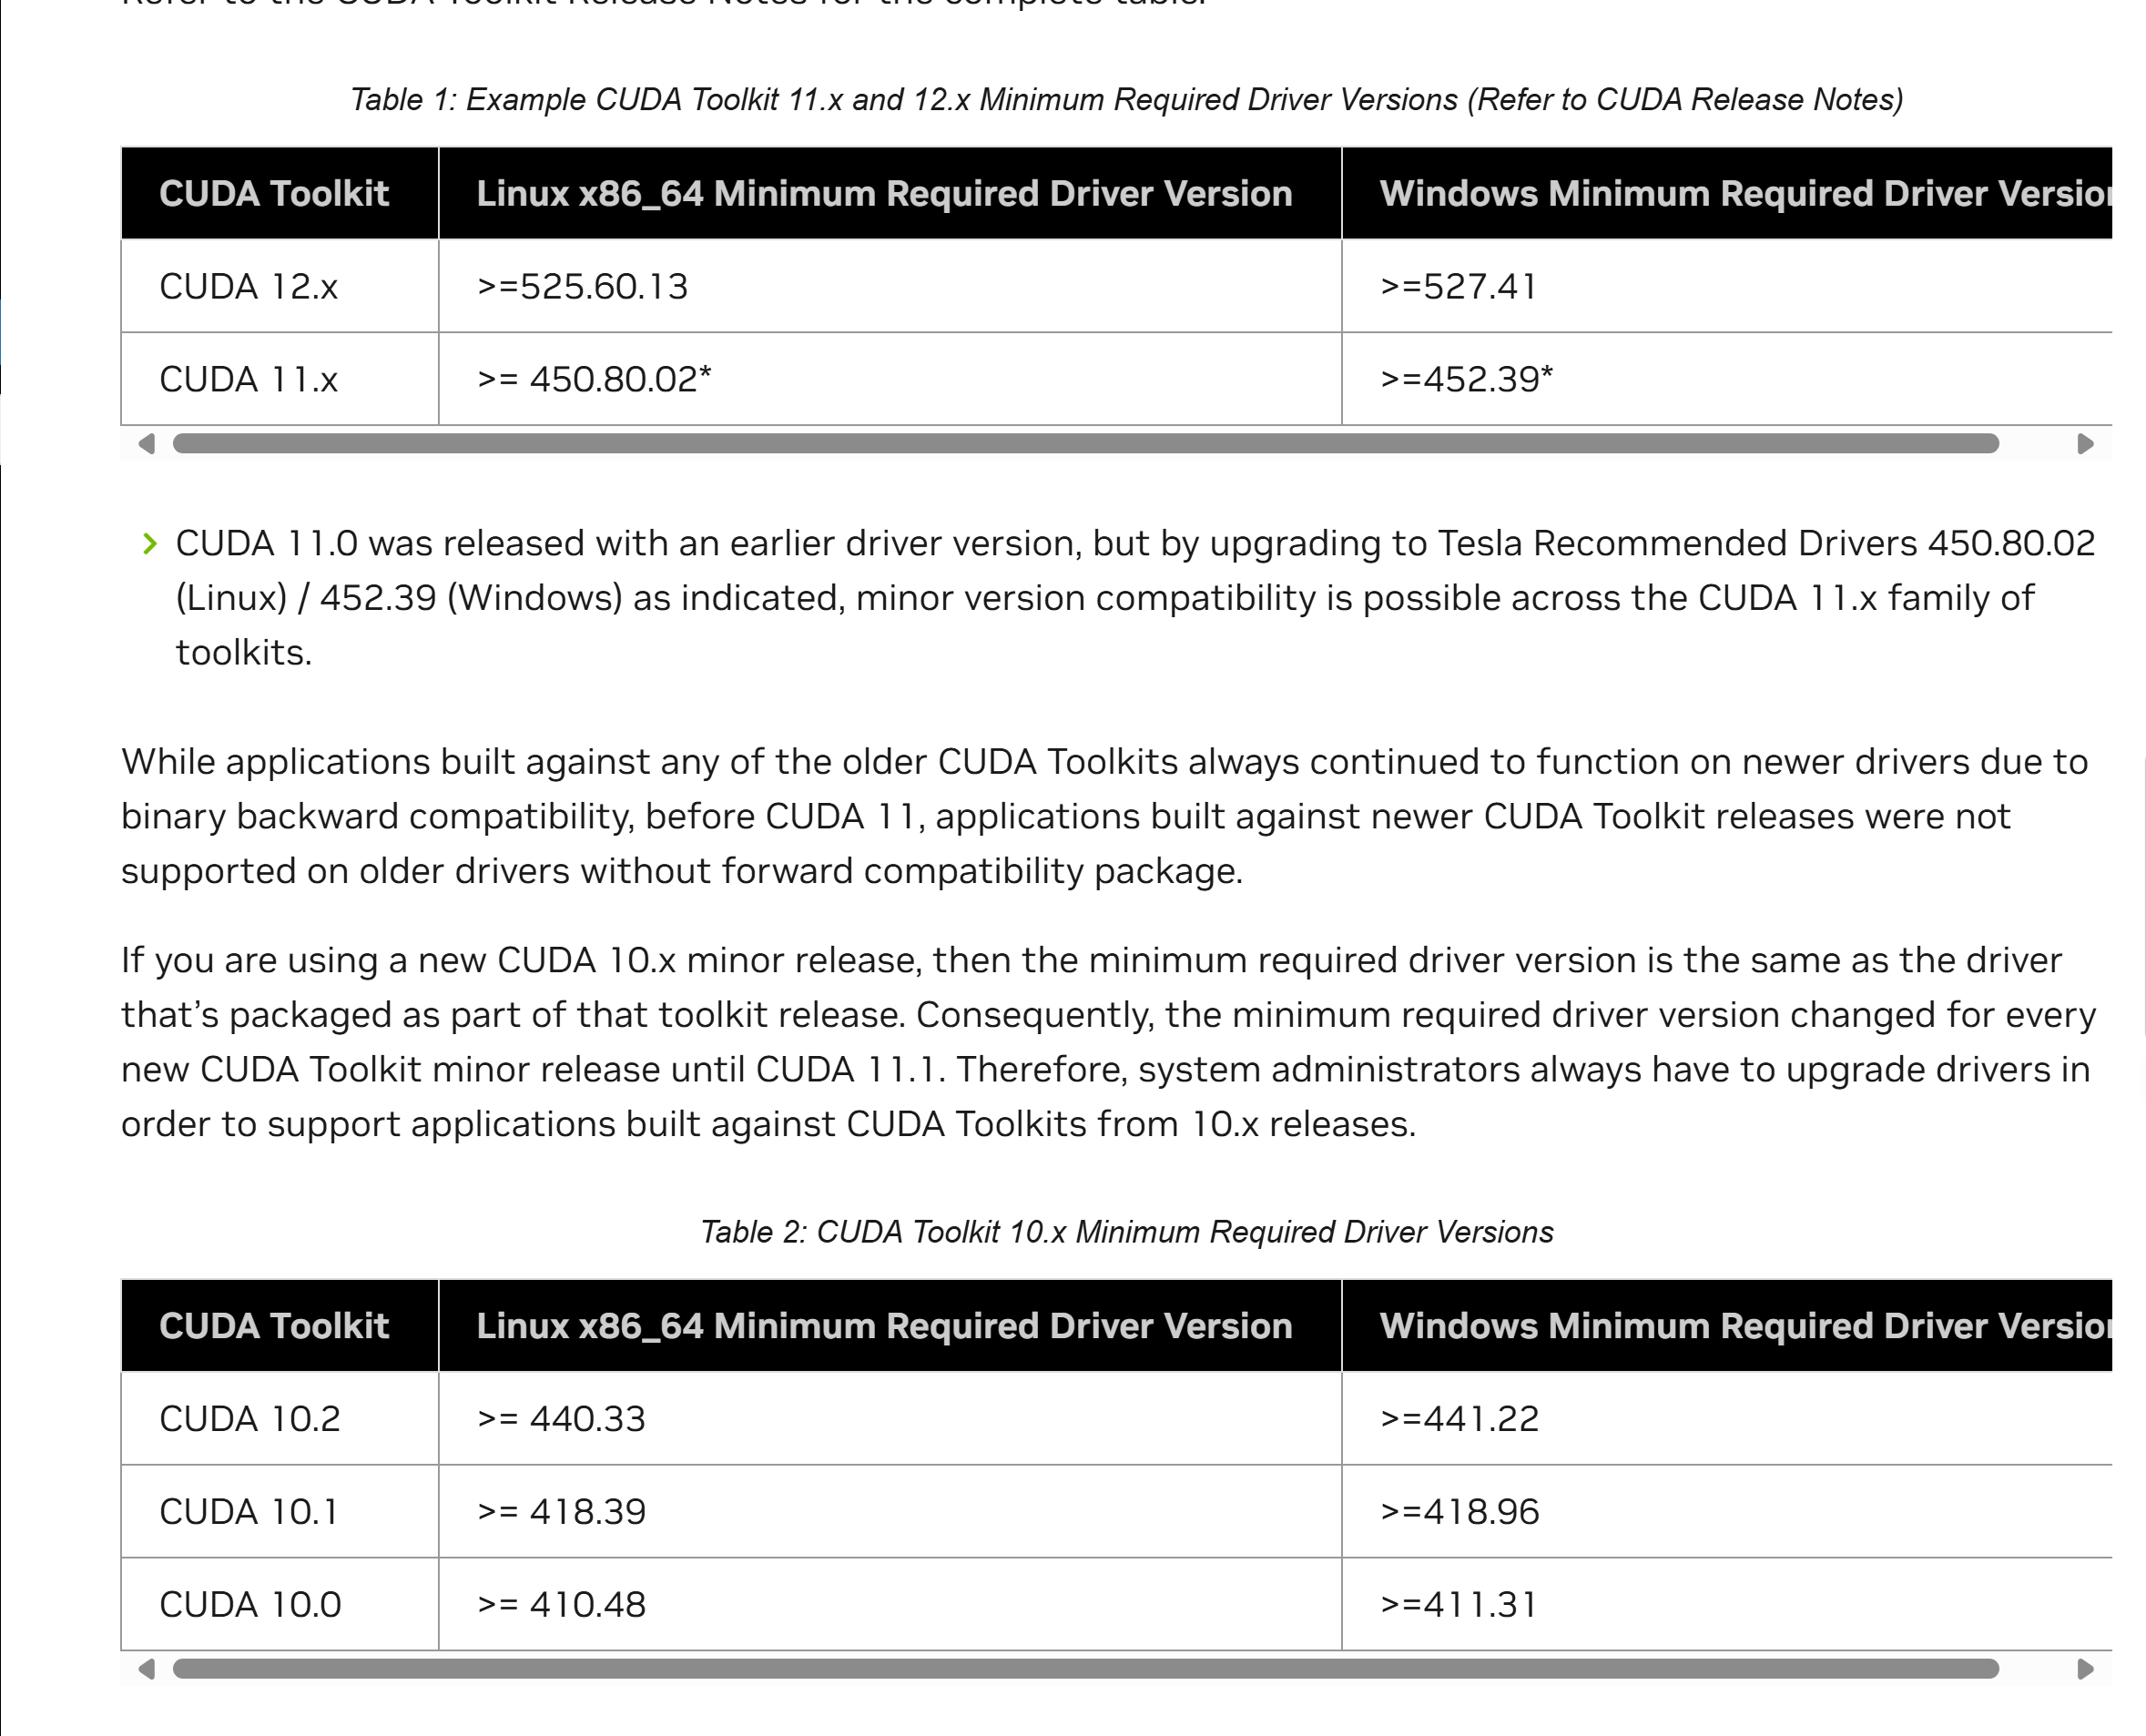 Download the CUDA driver from this link (I have already selected the options, just download).
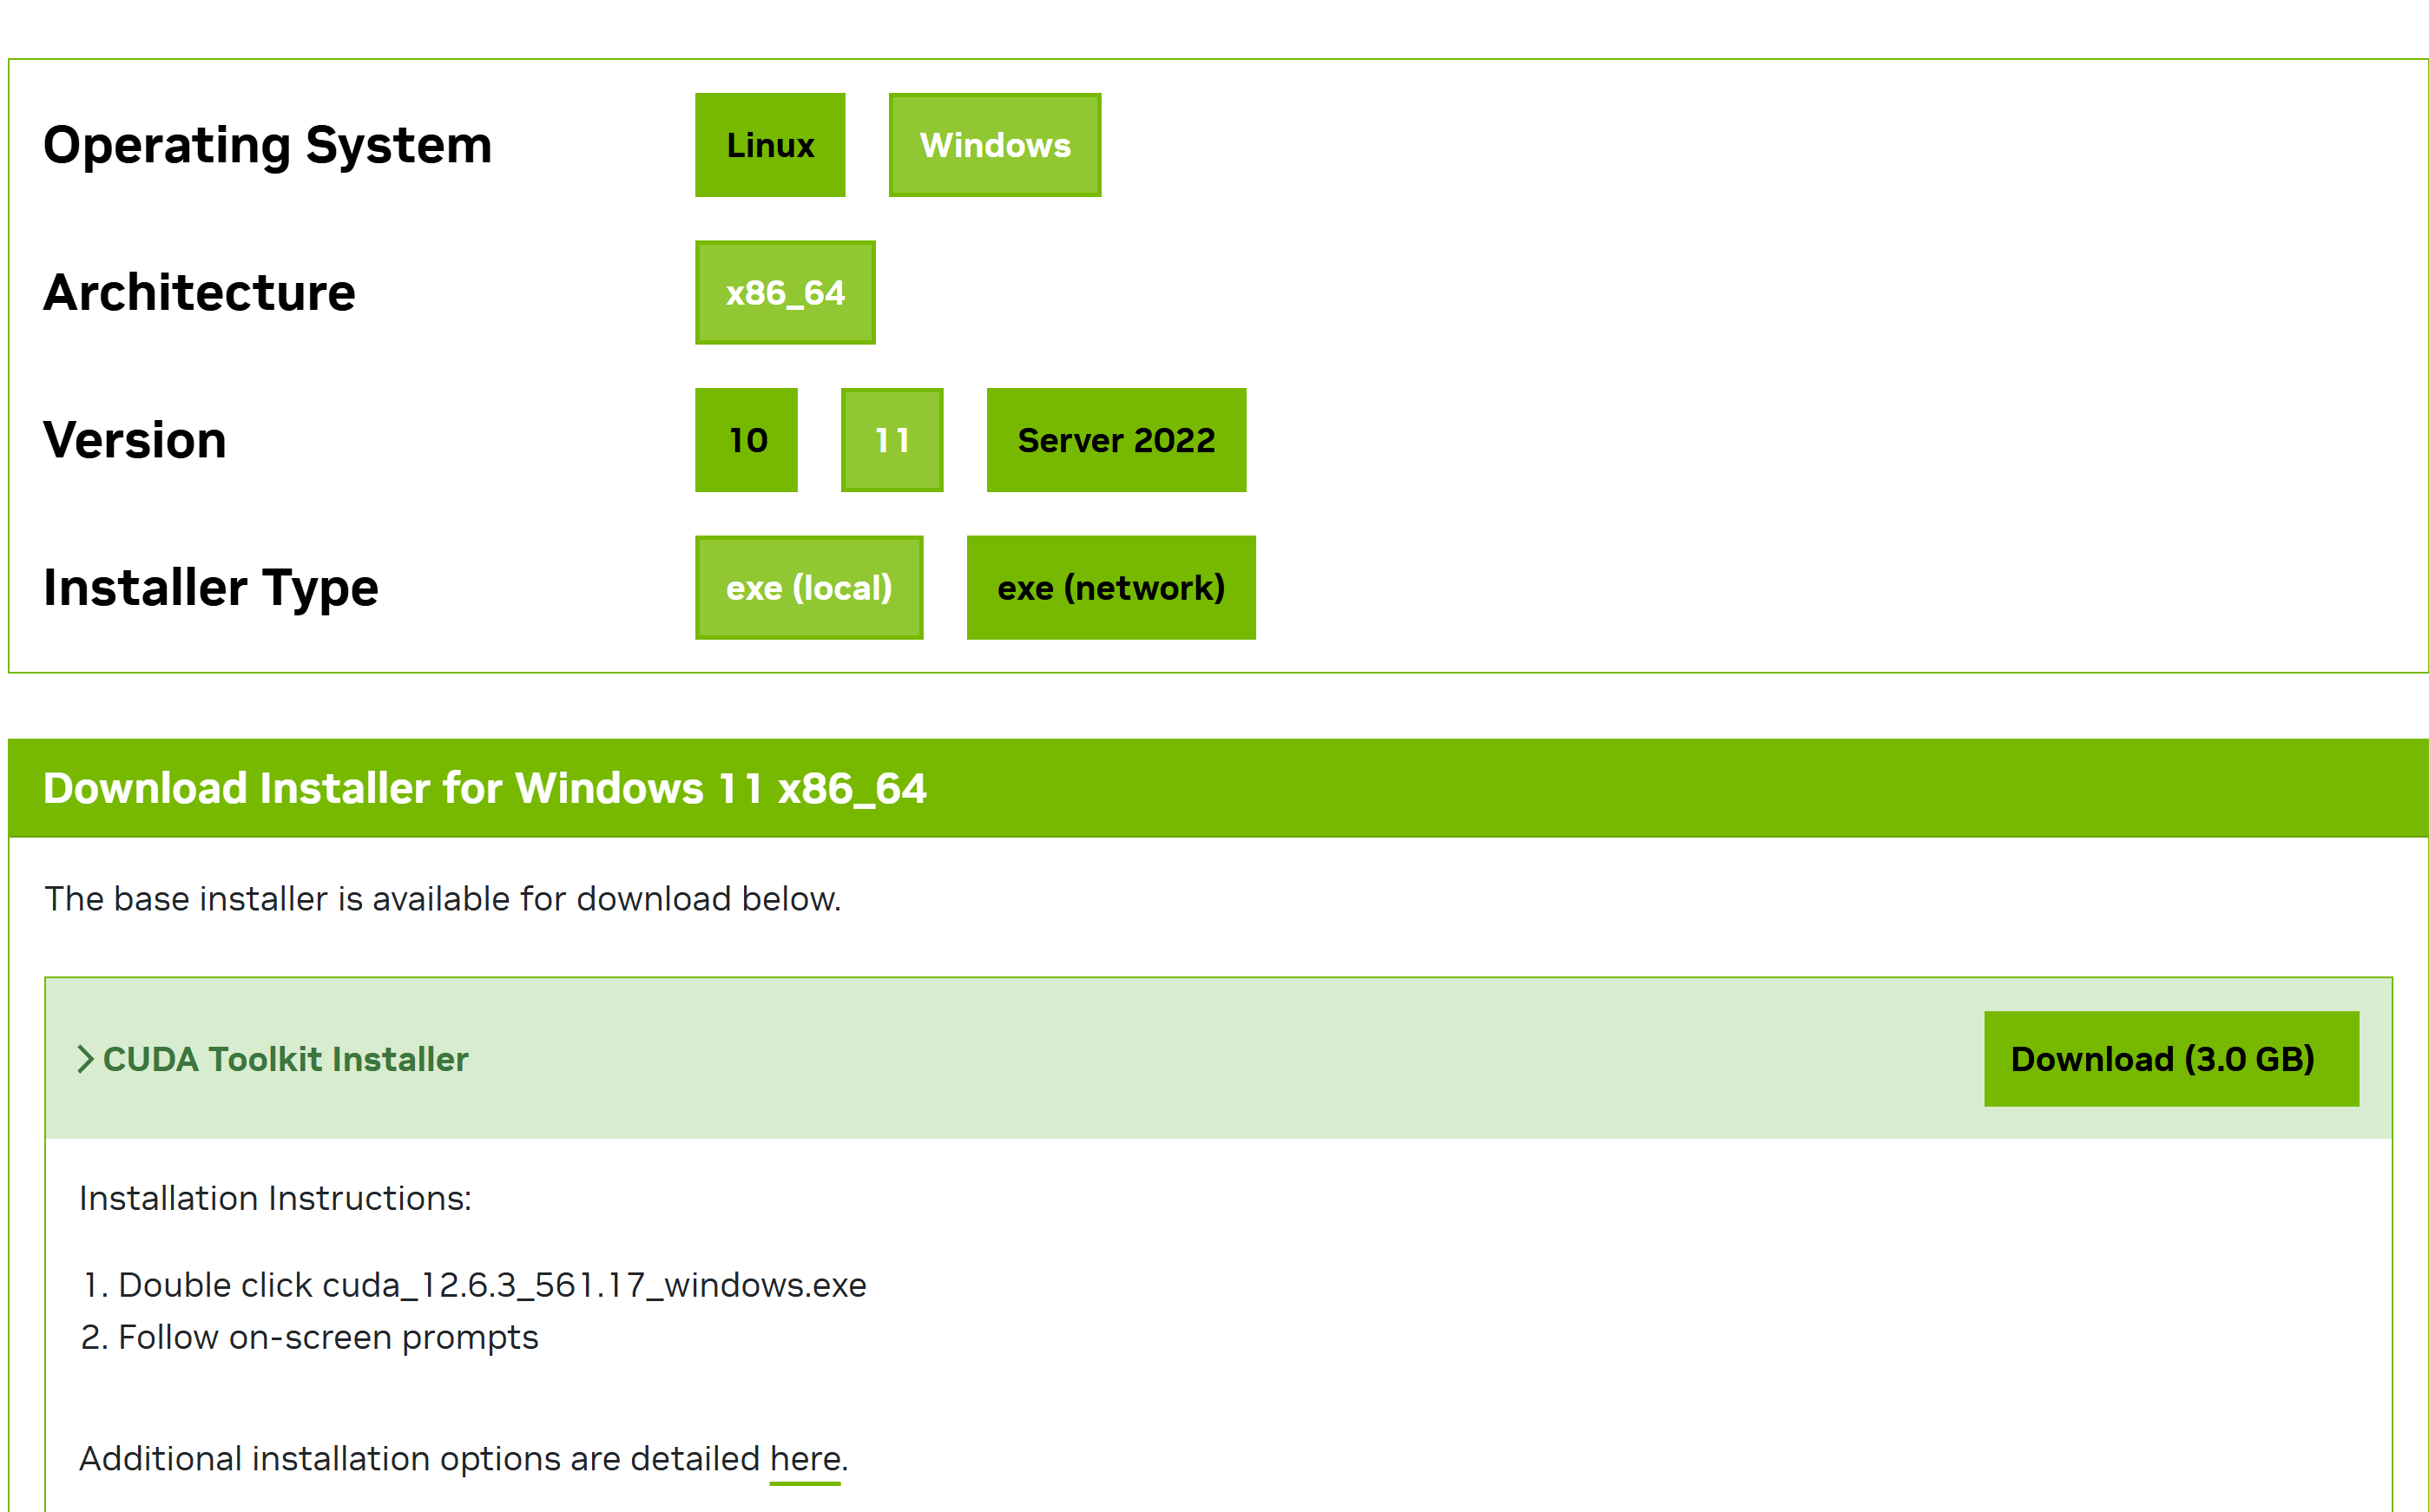 Restart your computer after installation.
After restarting, open the terminal and enter:
Restart your computer after installation.
After restarting, open the terminal and enter:1
nvcc -VIf CUDA-related information is displayed, the installation was successful.
- Install PyTorch
Open the PyTorch official download page
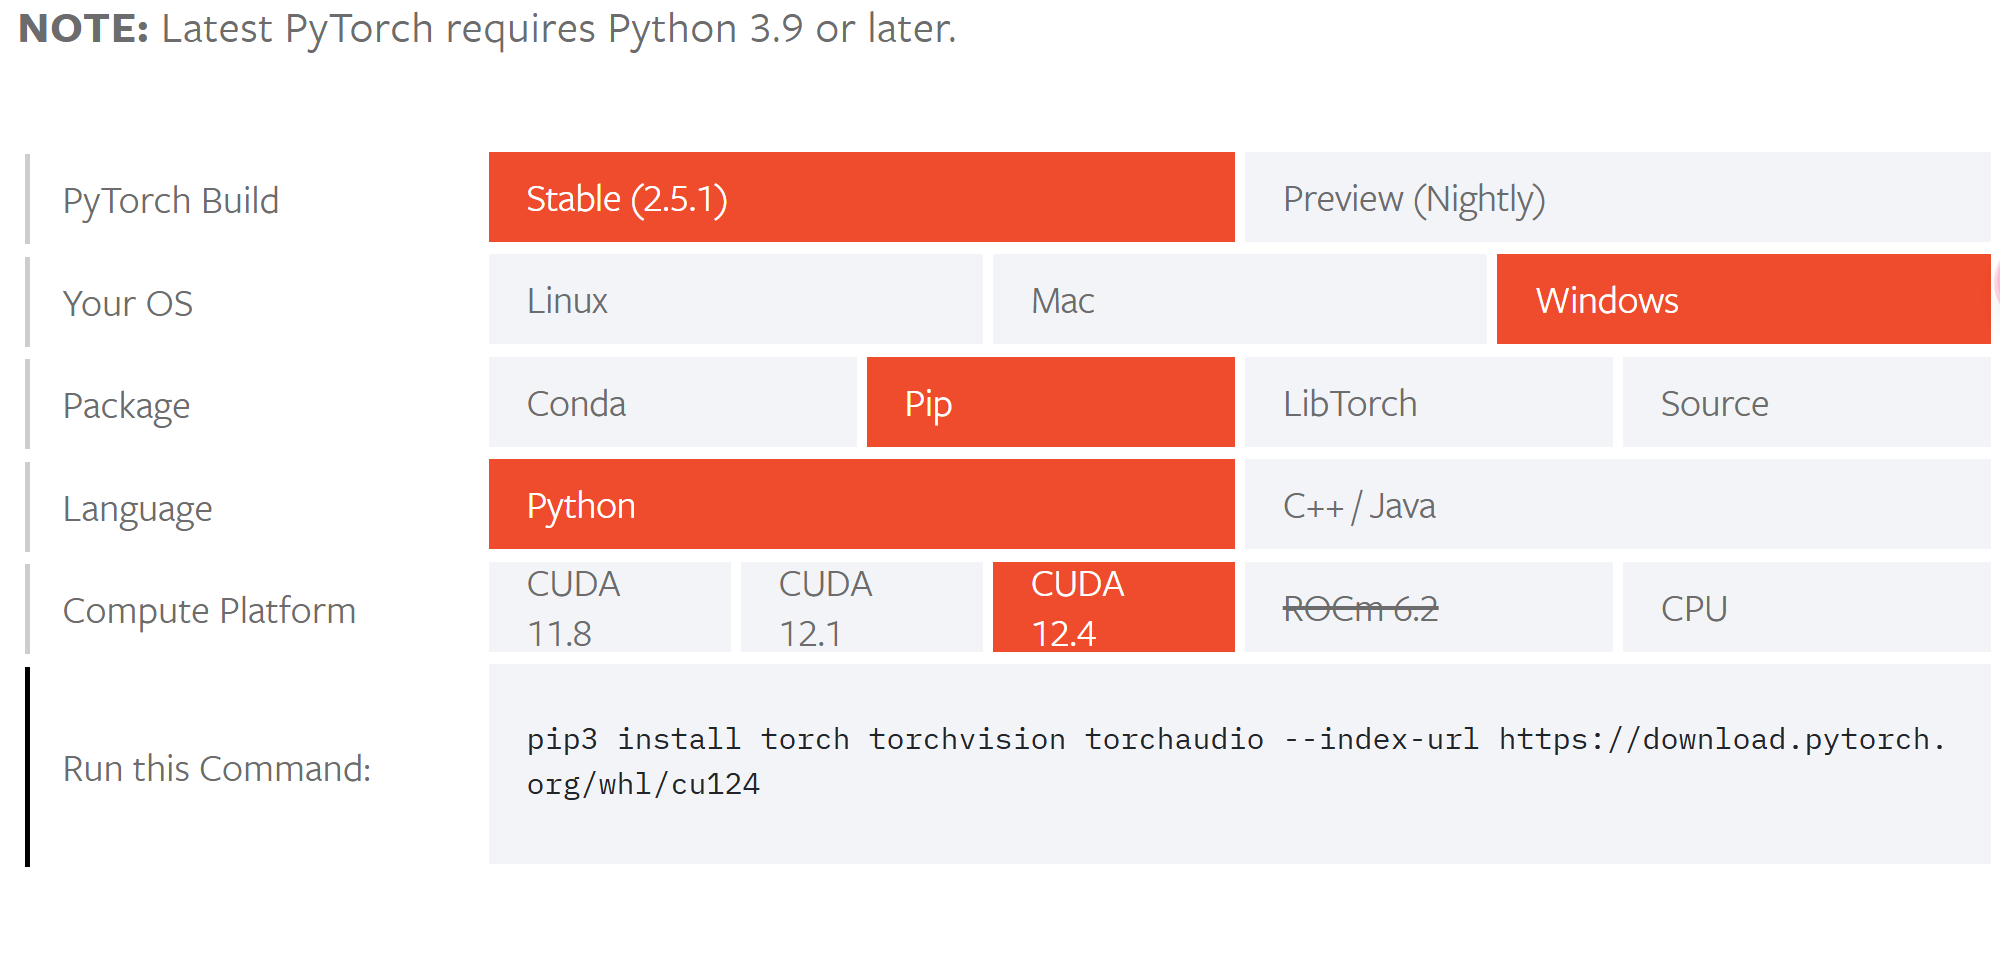 Select the corresponding command, copy it to the terminal, and download (it is not recommended to install in the base environment).
Installing Common PyTorch Tools
I use conda for installation. How to install conda.
- jupyter (A brief introduction; advanced jupyter content will not be covered here)
Conda comes with jupyter. I will mainly explain how to create a virtual environment with PyTorch installed and import this virtual environment into jupyter.
Use the following code (note to use your own Python version; copypython -Vinto the terminal to check your Python version):1 2
conda create -n pytorch python=3.10 conda activate pytorch
Then, install PyTorch in this environment using the method described earlier. After installation, restart the terminal. Create the corresponding IPython kernel:
1
python -m ipykernel install --user --name=pytorch --display-name "Pytorch_env"
Start jupyter:
1
jupyter notebook
You will now see the newly added jupyter kernel.
- Tensorboard (Optional)
Switch to the environment with
PyTorchand install:1
conda install tensorboardStart Tensorboard:
1
tensorboard --logdir=logs
logsis the folder where logs are saved; please replace it accordingly. - Pycharm
A basic IDE tool; no detailed explanation will be provided. Simply download and install. Advanced content will be covered later.
Ensure the interpreter is set to the environment withPyTorch. You can test by importing torch.
FAQ
- If conda commands cannot be used
Check that the environment variables are correctly configured, then enter in the terminal:
1
conda init
- How to test if GPU can be used
1
2
import torch
print(torch.cuda.is_available())
If it returns True, the GPU can be used.
- How to test GPU compute capability
1
2
import torch
print(torch.cuda.get_device_capability())
Summary
The above covers the installation methods for PyTorch. I hope this is helpful to everyone.
